I recently built a custom oak built-in for a new client. It was both the largest and the finest built-in that I have undertaken to date. This project presented me with many challenges and learning opportunities along the way. Most of the built-ins that I have built have been painted, however this one was solid oak with book case uppers and cabinets with doors for the base cabinets.
I had originally planned to build this unit on site, but after giving it some thought I determined that it would be a better finished product if it were built in my shop and then installed on site. After another meeting with the homeowners to discuss details and take some detailed measurements I was ready to get started.
This built-in is wall-to-wall and floor-to-ceiling measuring 96" tall x 118" wide. I felt that it would look best if we divided the 118" into four sections to give the overall built-in proper proportions.
CONSTRUCTION
I started with the four book case uppers. The first thing I did was create the arch tops. The overall construction was typical cabinet construction except for the bottom of each unit as it did not have a bottom. I dealt with this by adding some temporary bracing to hold everything square and secure.
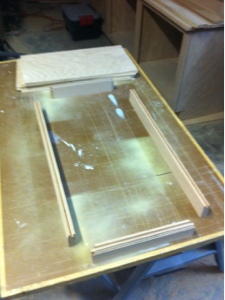
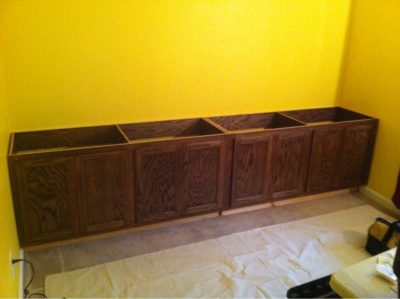
Next step in my process was to build the base cabinets. Rather than build four base cabinets I built two with a center divider in each giving the look of four cabinets which maintains the proper proportions. Once again the construction of the bases was typical cabinet construction. I also built doors for the base cabinets which isn't the first time I've built cabinet doors but it was the first time building doors of this style. They are a typical frame and panel construction with a Roman Ogee detail. I had to purchase the 2 piece router bit set to accomplish this and was pleased with the overall results. I did, however, learn a few tips and tricks that will be useful in the future.
The top for the base cabinets was solid oak. I used 2) 1x 12x 10' tongue & grooved together with a Roman Ogee edge. I couldn't be happier with how well the top turned out. I hadn't ever routed out a tongue and groove like this before and it turned out great and the top looks beautiful.
The final two pieces to complete the construction was to create the header piece and the crown molding. The header piece was just a 10' piece of 1x4 oak with a Roman Ogee detail and the crown was just a piece of store bought molding.
Each bookcase received 4 shelves and each base cabinet has 1 shelf. All shelving was completely adjustable using shelf pins with pre-drilled holes. I use strips of pegboard to duplicate accurate pre-drilled holes.
LIGHTING
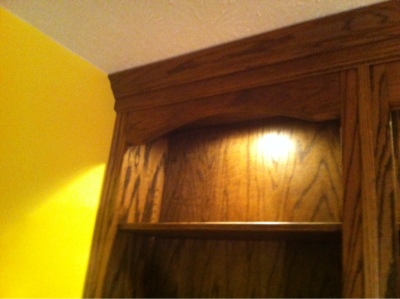
Per the homeowners request I installed lighting in the tops of the bookcases. I picked up some under cabinet puck lights that I recessed into the tops of the bookcases. After final installation the lighting and wires aren't accessible so I made the tops of the bookcase removable in case there are ever any issues. There are 4 lights that are all daisy-chained together and plugged in to an outlet behind the base cabinets. I ran the power supply in between the middle two bookcases and added a switch in the third cabinet from the left so when you enter the room you don't see the switch.
FINISHING
The built-in was finished with a dark stain from Minwax. The homeowners had an old oak desk that they wanted to match so I actually had to pick up a couple different stain colors and create a custom color to get a good match. I'm a fan of polyurethane to seal and protect my projects so I used a Minwax clear satin fast drying polyurethane. I also like to thin my poly with mineral spirits, I feel like it makes for a smoother finish. All of the stain and poly were brushed on since I don't have a spray booth.
INSTALLATION
Installation day always makes me nervous and this install was no different. Although I knew all of my measurements were correct and I had a solid plan for the install I was still nervous. Well as it turns out, I had nothing to be nervous about, the installation went smoothly.
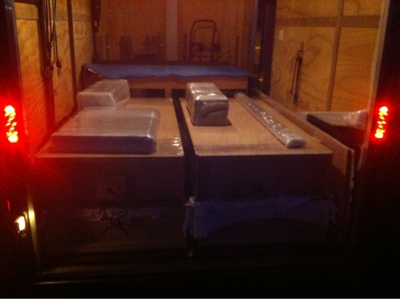
Part of what makes me nervous about the install is the transportation. But, again, this went off without a hitch and all components arrived on site unharmed.
We started by laying out drop clothes to protect the carpet as it was a rainy day. Next I removed the base board trim where the built-in was going. At this point we started installing the base cabinets. Once they were installed I moved on to the top for the cabinets. I made the top a couple inches too long so I could cut the ends to fit once on site. This was probably the one aspect that had me the most nervous, you only get one shot at this and if it's too short you'll have gaps and if your not careful you can damage the walls. Well, I made some careful calculations as to the slight "out of squareness" of the walls and the overall length and went for it. It was a perfect fit and I couldn't have been more relieved.
With the top installed I pre drilled the hole for the electrical and moved on to the bookcases. I started with the far right bookcase and worked my way to the left until all four bookcase were in and secured them all together. Once I had them all secured together I anchored them all to the wall and moved on to the finish trim.
We cut the header piece and crown molding to fit and installed them across the top of the unit. With these installed we moved on to the scribe moldings that were installed to cover up the small gaps on each end. I also had made up some moldings to finish off the seam between each cabinet. I had a hard time deciding whether or not to actually use them so I called in the homeowner and let her make the final decision. She chose to have the moldings installed and I think it was the right choice.
The last step of the installation was to wipe the entire unit down with some Old English furniture polish and install the shelves.
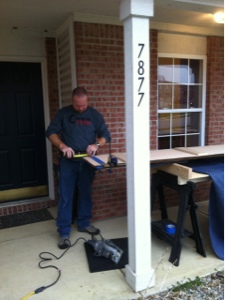
The install took about 5 hours to complete with the help of my step-son Jackson and my father-in-law Duane.
That wraps up this post, this was one of my most rewarding projects. Everything turned out great and the homeowner's expectations were surpassed.
Thanks for reading.
Rex