This past week we wrapped up another small remodel project. This project was mentioned in my 'Long Hours' post. This was a nice little job close to home and for the most part everything went smoothly.
I say 'for the most part' because we did have 2 small setbacks.
As mentioned in the previous post, the homeowners experienced a small delay in taking possession of the property so we lost one day from our original schedule(hence the Long Hours). All in all, this wasn't too much of a problem. We were still able to finish the job on time and within the original budget.
Our second setback was tearing up the old flooring. As with any remodel, sometimes you just never know what you might be getting into. The carpet came up without a problem, as expected. As for the linoleum in the entry and kitchen, well that was an entirely different story. 5 layers. 1/2" particle board, 2 layers of old linoleum, 1/4" underlayment, and another layer of linoleum. It was an absolute bear to remove. However, we did get it all up and all the floors were stripped down to the bare sub-floor.
With the floors stripped, we installed Durock cement backer in the kitchen and entry. Followed by the installation of the tile. Everything was pretty straight forward with the tile installation, just a 13"x13" tile,no angles or fancy patterns.
Throughout the living room, dining room, and hallway we installed 12mm engineered wood laminate flooring the homeowners purchased from Lumber Liquidators. It was again, a pretty straight-forward installation finished of with the installation of new shoe-molding.
Aside from the flooring we removed a wall separating the kitchen and dining room. The two rooms still have the same footprint but having the wall gone really opens things up visually.
One last thing we did was wire in for a ceiling fan in the living room and master bedroom.
Like I said, this was a nice little remodel. The home-owners are a younger couple who have purchased a nice little home that's just a little outdated and they have a few more projects they plan to tackle down the road. I have a good feeling we'll be getting a call when the time comes.
Well that's it for now, thanks for reading.
Remodel Photos
Friday, September 30, 2011
Sunday, September 25, 2011
Long Hours
Lately we've been working long hours on our latest renovation. It's not a big project but, due to delays with the homeowners getting the keys and having another project we need to get to, we're putting in the overtime.
So far, we've demo'd the wall separating the kitchen and dining room, tore up ALL of the flooring on the main level, installed cement backer board, 200 sq. ft. of tile and about 450 sq. ft. of 12mm Brazilian engineered wood laminate flooring. At this point, we're about 90% complete and it feels good knowing that this project is nearing an end. Good news is, the homeowners have additional projects to tackle down the road and I've got a good feeling that I'll be getting a call back.
As for the long hours, like anything, there's pros and cons that go along with it. It seems to me that there is an increase in the daily productivity. Obviously, if your working longer you'll get more done but I think it's more than that. I feel like I get into a groove or a zone and if I stay 'in it' and keep working rather than stopping to pickup tools just to drag them back out the next day. So basically, I guess the longer hours give you more productivity and less set-up and breakdown each day.
Another positive to the longer hours is it kinda makes me feel good. At the end of the day, I feel good knowing that my clients are getting their money's worth. There's something therapeutic about a good, long, hard days work.
For me, the biggest down side to the long hours is my time away from my family. I would really like to spend more time at home but I know that I'm earning a living for my family, and that feels good. I just wish there was a way to 'bank' the home/family time from the slower times, but that's life I guess.
And then there is the obvious fatigue that comes with a longer work day. I love what I do, I like working with my hands, being creative, solving problems etc. But, sometimes I feel like I'm wearing myself out.
All in all, I would rather work long hours than not have any work at all, and to me the pros far out-weigh the cons.
So...I'll be back at it tomorrow.
Thanks for reading.
Rex
Wednesday, September 21, 2011
Theater Room
Recently I wrapped up a Custom Theater Room Transformation. The end result was a huge success. The total project was spread out over the course of three and a half months. We had some prior, ongoing commitments and the client was saving up the funding as we went along so, in this situation it worked out for all parties.
The existing space was an unfinished 10'x16' basement room with 4 concrete walls and one door opening. Per the clients specs/vision, the space was to be transformed using decorative columns, custom woodworking/moldings, an elaborate lighting plan and too many other details to even wrap your mind around. I'll do my best to explain.
Before we began the client had an HVAC contractor come in and raise the existing duct work so it was less of an obstruction.
One detail that had to be worked out before we began was to figure out who-what-when-where-how we were going to come up with all of the moldings we would need. The client had some specific, one-of-a-kind capital and base moldings that he wanted produced. Well we couldn't find them anywhere, nor could we find someone to mill them at a reasonable price. Having exhausted all other options the client provided me with a disected breakdown of the molding details, so I figured I would give it a try. Success. I started by making up a couple sample pieces, we made a few tweaks before production, and the end result speaks for itself.
Our first step was to build the platform for the upper sitting area, we built a bulkhead around the new ductwork, installed 1x4 slats 12"o/c for the ceiling tiles, installed 2x6's around the perimeter as 'beams'. I then installed 2x12's and 2x10's(corners) for all of the columns. As mentioned, all of the walls were concrete so all of the electrical lines were recessed into the backsides of the columns and beams. So, at this point, we mapped out all of our electrical, removed all of the columns and beams and routed out tunnels into the backsides of the columns and beams.
The baseboard trim went in next, basically just a 1x8 with a detail routed into the top to match the trim in the rest of the house. We layed out the louvered lights and cut the holes.
My next step was to route the fluting into the columns. This was another 'skill builder' as I had never done this before. But I knew with careful planning and accurate calculations that I could pull it off. I started by building a 2 part jig. One part sat on the column, like a saddle, and the other piece nested into the 'saddle' and was adjustable. There is much more explaining to do but maybe that should be anothe blog post.
We also had to route out for the rosettes at the tops of the columns, which required another jig. So, we removed the columns, one at a time, and routed the fluting and rosette recesses and reinstalled each column.
With the electrical buried behind the columns and beams and all of the routing done I patched and filled all of the holes and put a coat of primer on all of the woodwork.
At this point in the project I was not on site much, we had a family vacation, and I spent a great deal of time in the shop creating the capital and base trim for the columns. I think, out of all that I did on this project these moldings are what I'm most proud of. I never imagined that by simply disecting the moldings thta you could make them, piece by piece, laminate it all together and it turn out as good as it did.
I think that is it for now, I'll pick up where I left off soon.
Thanks for reading.
To see before, during and after photos follow the link below.
http://www.facebook.com/media/set/?set=a.237501969634059.77265.132384660145791
Theater Room 2
Continuing on the theater room, when we left off we had just gotten the primer coat on the columns and beams.
Our next step was to install the oak border around the perimeter of the two levels of floor. We used standard 2/1/4" oak flooring, 3 wide around the perimeter. We installed bull-nosed edging and a cove molding on the front edge of the step. After some prep work we finished the oak with 3 coats of polyurethane. The room had been previously used as a weight room with 3/4" thick rubber mats for the floor. Per the clients design we re-used these mats by inlaying them within the oak border.
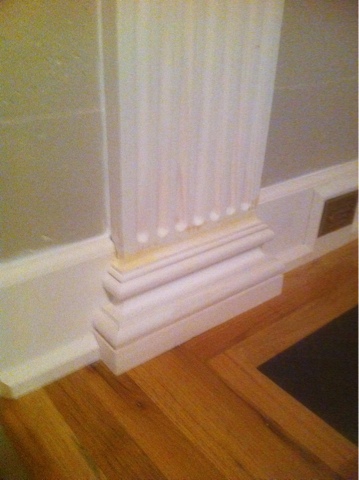
At this point it was time to install the custom moldings for the column bases and capitals. I must say, the project started to get exciting at this point. we could start to see things come together and the project seemed to gain momentum.
Per the design, the moldings were to be blended into the columns which took a bit of time applying wood filler and extensive sanding. But, after that and some additional paint prep we were ready to begin painting. The paint process took about a week or so, two coats of off white paint on all woodwork and the brick/ concrete walls received 2 coats of a grayish/brown color. For both colors we took paint chip samples to Lowes and were able to achieve a near perfect match.
After a little bit of a delay with the electrician(that'll be another post for another day) we were able to install the ceiling. 12"x12" Armstrong ceiling tiles, once again, purchased from Lowes. The ceiling was finished off by installing a simple crown molding that matched the shoe molding around the flooring all if which was custom made...simple but custom none the less.
We had a couple more days while the electrician finished up his end of things. A little paint touch up and few punch list items and it was FINISHED!!!
3.5 months of careful planning and hard work and execution had paid off.
The best part is that in the end, everyone was happy.
The end
For more information feel free to ask.


Our next step was to install the oak border around the perimeter of the two levels of floor. We used standard 2/1/4" oak flooring, 3 wide around the perimeter. We installed bull-nosed edging and a cove molding on the front edge of the step. After some prep work we finished the oak with 3 coats of polyurethane. The room had been previously used as a weight room with 3/4" thick rubber mats for the floor. Per the clients design we re-used these mats by inlaying them within the oak border.
At this point it was time to install the custom moldings for the column bases and capitals. I must say, the project started to get exciting at this point. we could start to see things come together and the project seemed to gain momentum.
Per the design, the moldings were to be blended into the columns which took a bit of time applying wood filler and extensive sanding. But, after that and some additional paint prep we were ready to begin painting. The paint process took about a week or so, two coats of off white paint on all woodwork and the brick/ concrete walls received 2 coats of a grayish/brown color. For both colors we took paint chip samples to Lowes and were able to achieve a near perfect match.
After a little bit of a delay with the electrician(that'll be another post for another day) we were able to install the ceiling. 12"x12" Armstrong ceiling tiles, once again, purchased from Lowes. The ceiling was finished off by installing a simple crown molding that matched the shoe molding around the flooring all if which was custom made...simple but custom none the less.
We had a couple more days while the electrician finished up his end of things. A little paint touch up and few punch list items and it was FINISHED!!!
3.5 months of careful planning and hard work and execution had paid off.
The best part is that in the end, everyone was happy.
The end
For more information feel free to ask.
Tuesday, September 20, 2011
Getting Started
Hello,
This is my first blog posting. My wife is soooo excited. Not sure what the big deal is but I thought I would like to check it out. I guess what appeals to me is sometimes I want to elaborate more on a given topic and twitter and facebook don't seem to be the forum for that. But, what I have noticed is people posting a link to their blog or their blog posts to the various social networking sites. So I guess that's my main reasoning for starting up the blog.
Further more, sometimes I may just want to vent and get people's feedback on similar experiences and how to deal with certain situations or people.
Like I said, I really don't know too much about the blogging world but thought it might be worth checking out and seeing what it has to offer.
Stay tuned for more.
Rex
Subscribe to:
Posts (Atom)